Showing posts with label clay. Show all posts

Monday, March 22, 2010

What's New

It's been awhile since I've written, have been sick...and absorbed with some new stuff I'm working on.   Thanks to Jenni of Foreverbeading I was inspired to make my Cheshire Cats into beads.  I'm pretty excited about them so far.
I've also been working on some more designs where I incise an image into the moist clay. It gives a stamped appearance but it's an original each time.
I started to make another raven today, but it ended up being a dragon.  I try not to fight the process to much because if it didn't want to be a raven, it wasn't going to happen. 

 I think I'll try to do something where I give it a light coating of glaze and stuff most of it in the pressed design. Can't wait until it's dry and bisque fired!

Wednesday, March 10, 2010

Spectrum Raku Glazes, Amaco Raku Glazes

So I've been really getting immersed into my raku firing.  I started out with Amaco Raku Glazes and I do like them, but I'm really excited about my new Spectrum Raku Glazes .  I do my raku firing on a very small scale, I have a small kiln about 8 inches by 8 inches. My "receptacle" is a repurposed metal pot with lid.  My "organic material" of choice has been by far to be newspaper, newsprint-not the colored ads. From my own tests and experiences I have learned this :
  1. don't allow a lot of open space inside the "receptacle"
  2. newspaper is superior because it readily ignites and doesn't mar the surface as much
  3. allowing the item to sit in the flames with the can open has produced more dramatic color effects and thicker smoke which helps blacken unglazed surfaces better
  4. always use the recommended three coats of raku glaze for best results.
  5. Stoneware clay makes an excellent raku clay
Of course, this is my own personal observation, but since I've been following this, I've had better results with my pieces.

Spectrum Gator Skin is my new favorite. If anyone is just starting out and only buying one color, this is the one I recommend.  Applied thin, it gives an almost dappled streaky copper look. Applied thick, it looks very much like the sample picture.  It is a gorgeous matte color.  With a thick application it gets nice and crusty. It's a more expensive color but very well worth it in my opinion.
This picture is good for showing the glaze in thick and thinner applications. Applied thinner it is more earthy and dappled brown.
 
The pendant above has the "gator skin" put into the grooves of the heart.  Then I put 3 coats of Amaco white raku glaze. They seem to react very nice together, developing a warm silvery ivory to shades of copper.

Spectrum Nebula is another shade that I purchased.  This one is a bit trickier to work with, but I think I've discovered a trick.  Without enough time in the flame, "Nebula" is kind of a flat aqua shade, but if you give it enough time in the flame, it becomes very worthy of it's name. What I ended up with was : 
Blues, reds, and copper colors mainly.  It can produce a pretty rainbow effect.

Another color I purchased was Spectrum Cobalt .  So far I've gotten a few different results. None quite like the picture shown when I ordered it, but still very attractive.  I've gotten a deep slightly transparent blue, and with optimal conditions a lot of silvery metallic as well.

This is the cobalt. I used the gator skin for the beak, a very thin coat (produces a pretty rusty color).  I also rubbed some of the gator skin into the letters. When the two react, I've gotten a bit of a golden hue surrounding. 

This is what happens if there is not enough reduction going on in the "receptacle"
Still a pretty color, but not very dramatic.

I still like my Amaco raku glazes quite a bit. My favorite colors are white:
Copper Patina:
and Bluebell:
Hoping this helps anyone looking for some visual examples of some of the glazes out there. Please feel free to message me if you have any questions about any of my experiences with these colors.

Wednesday, February 10, 2010

Useful Things to Know When Working with Clay -- Part 1

I've been thinking a lot lately about the merit of a bamboo skewer.  You can get a big package of them for about $1 and they are about the best tool you will find for working with clay.  I've used them to carve details, create molds, poke holes, hold beads for drying, wrap wire for loops and I'm sure I've used them for other things.

Another thing I love is polymer clay.  I use it to make molds quite a bit. You can press buttons into it, as I've mentioned, but try rolling out a sheet and them poking it with the blunt end of the bamboo skewer, or try using a straw.  You quickly create a texture similar to that of a sea urchin test or a tribal design of dots. You can coil metal wire and press it into a sheet of polymer clay and you can create another pattern.  I do this with earthenware clay too, but polymer has the advantage of being able to be baked right away, and test the design.  I've recently been working on molds using polymer clay and bamboo skewers to make floral molds for pendants.

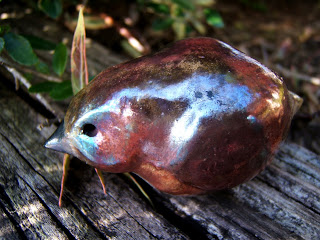
I've learned that stoneware clay makes beautiful raku pieces and that lower temp clay doesn't work as well because it becomes too close to vitrification and won't pull in the smoke as well.  This was a HUGE tip to find because it has a made a tremendous difference.
 
  
As you can see these are a big improvement over my first birds.  They hold up to the thermal shock wonderfully as well.

Friday, February 5, 2010

The Good, The Bad, and the Ugly

THE GOOD -So I've been experimenting in the wild world of firing and glazing ceramics.  I've mostly had experience in the sculpting phase so this is uncharted territory.  I've had a few pieces so far that I'm quite pleased with, and I've come up with some techniques that I like.  Most of the pieces in the above pic are pretty much exactly what I was going for...color wise and also the finish is pretty. 

THE BAD-This is what happened when I tried my hand at raku firing.  I'm still in the trouble shooting phase obviously.  I was kind of heartbroken over this because a few of them looked very nice....until their heads cracked off.  I'm beginning to wish I had bought the raku clay after all but at the time I wasn't planning larger sculptures.  I was reading on a raku site where it recommended underfired stoneware clay...which I have about 80 lbs of..so I might see how it holds up to the thermal shock.  I also learned that mostly I'm not painting on my glaze nearly thick enough.  The thicker ones came out better.  Also so far spanish moss produces a nicer effect than pine hamster bedding.  I think I'll try newspaper next time though. 

THE UGLY--Structurally they are sound, yet the colors are pretty ghastly.  Some are from my first raku firing attempt  where I did not use a thick enough application of glaze.  I don't like the color of green on this bird and the other bird is not THAT bad, just rather dark so it's hard to see the detail.  These are the "what not to do beads". 

I've actually managed to have some jewelry quality beads though so that's not bad for just starting out.  My first lampworked beads were very grim so I need to remember that when I'm feeling disheartened.

Tuesday, February 2, 2010

Silky Birds

Yesterday I made some super cute bird sculptures, they are so silky soft with plump bodies like little wrens or sparrows.  I think I'm beginning to realize why I am enjoying clay so much.  Don't get me wrong, I love the glow and sparkle of glass, but the frustration of being constantly interrupted at home and fact that my hands would go numb at the most inopportune times, it was too stressful to get very much enjoyment out of it.  The kneading of the clay feels so nice on my hands.  When I'm sculpting, it's almost like I'm caressing the clay into being.  The design I like best is so simple yet I think it is elegant.  I've made some more ornate birds but the silky smooth ones will be the kind that people just want to hold.  I wanted a very simple design because I think it will show off the raku glaze to the best advantage.  Now if only my kiln would arrive so I can fire this enormous pile of greenware that is amassing in my garage.

Monday, January 25, 2010

Bounty of Buttons, Molds in the Making


            I love looking at buttons anyway but it sure is nice when I have a planned use for them.  They really make fantastic molds for clay bead making.  I use buttons pressed into polymer clay to make molds of different sizes.  Now, what's really great is that Joann's (my local craft store), had buttons AND polymer clay 50% off when I went in yesterday.  When I'm choosing buttons for molds I usually have a certain theme in mind, always Celtic at the forefront but also nature, sea life, and I like patterns that have a Moroccan look to them. I was able to find heart shaped Celtic knots, spirals, Claddaugh , sea shells and an adorable pine cone. Most of the designs can be used as a mold....OR I can fashion a polymer clay handle and I have a very nice stamp. I actually prefer the spirals stamped as opposed to molded.  I try to make two of each mold so I can press a ball of clay between the two to make a double sized button.  I also rolled some larger sheets of polymer clay to make a texture pattern.
          So far, my clay beads and pendants made from the molds look very promising. I'm waiting for them to finish drying and also waiting to get my new kiln. At least I know they'll be very dry by the time I fire them, haha.

Saturday, January 23, 2010

Mold Making and Hedgehogs


I've been working on making some more molds to use for my raised relief type beads. I've been using polymer clay to take impressions from all kinds of things such as leaves, twigs, and sea urchins. Now I'm working on ideas for frogs and hedgehogs. I love both, especially hedgehogs. I've also made some ceramic clay hedgehogs. Really excited with how they've come out. Should be getting a new kiln in a few weeks so this gives them lots of time to dry out before firing. I just love the color this clay is supposed to fire to...a nice speckled brown. I used to make glass frog beads--so fun to make and each had a different character. I'm really hoping my idea works for making these molds. I could always get a little plastic frog and press it into the polymer clay, but I'm hoping by sculpting the original it will give them more character.

Friday, January 22, 2010

Links

I'm adding some helpful tutorial links that have been inspirational and informative. I'll be adding more as I find them. Every time I pick up a new art form I seem to get the most pleasure learning it through my own research, trial and of course error. I found these most excellent videos on www.Youtube.com by an artist under the name BHClaysmith. They are so well done that you can really see what's going on.

Pics

So I haven't really played with regular clay since about middle school age, which is quite awhile ago! I'm really excited with how these are turning out. I'm using high temp wire for the whiskers but I'll probably either loop the ends or epoxy tiny beads over the ends to make them a little less likely to catch on stuff.